The Pros & Cons of Commercial vs DIY Bioactive Substrates

The Pros & Cons of Commercial vs DIY Bioactive Substrates
Written by Mariah Healey, ReptiFiles.com
Although bioactive enclosures are becoming an increasingly popular way to keep reptiles, bioactive as we know it actually started with dart frogs. Dart frogs are a very sensitive set of amphibians that essentially can’t survive when kept long-term any other way, forcing their keepers to develop “bioactive” tropical vivariums for them.
While reptiles are generally much less sensitive than amphibians, it’s still best practice to take a “naturalistic” approach to their husbandry. “Naturalistic” means that their enclosure is set up to reflect the conditions of the animal’s habitat in the wild: temperatures, humidity, visible and ultraviolet light, substrate, plants, topography, etc. When you replicate the environment that shaped an animal’s evolution, it’s more likely to thrive in captivity. This approach has long been considered standard practice as a “best guess” for caring for a species when little is known about it.
“Bioactive” is the next step up from naturalistic. Aside from just re-creating the look and function of an animal’s habitat, bioactive is intended to create a miniature, fully-functional ecosystem. This ecosystem handles waste disposal and recycling, discourage the growth of pathogens, and increase positive factors like oxygen concentration, beneficial microbes, and humidity, with boosts your reptile’s immune function, hydration, and overall health. Most alluringly, it creates a terrarium that doesn’t require full routine cleanouts.
Of course, that’s assuming that you do it right.
While a bioactive terrarium requires several factors that must come together to function properly, the substrate that you use literally forms the foundation of the setup, and goes a long way in the long-term success or failure of your setup. After seeing the price tag on pre-made bioactive soil mixes, making your own bioactive substrate may be a big fat “duh”. But bioactive is much more complicated than it looks, and failure can be disastrous.
A bioactive-ready substrate must be compatible with the habitat’s humidity and drainage requirements, offer the right texture for burrowing, and be capable of sustaining healthy plants long-term. The wrong substrate will eventually kill a bioactive setup, and can become potentially dangerous to its reptile or amphibian inhabitant. As you consider buying pre-made or going DIY, keep these points in mind:
Commercial Bioactive Substrates
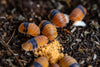
Commercial bioactive substrates are pre-mixed substrates specifically designed to be used a bioactive terrarium or vivarium. They usually come in kits with ingredients like sphagnum moss, leaf litter, microfauna inoculant, and drainage material.
Pros
- Come in a ready-to-assemble kit
- Choose your kit based on what type of environment your reptile needs
- Takes the headache out of going bioactive
- Almost fail-proof
- Guaranteed to be suitable for use with live plants
Cons
- Expensive
- Variable ease of use – can be difficult to find a mix for arid species in particular
- One-size-fits-all approach can create husbandry conflicts/confusion
- Can be difficult to know exactly what’s in the substrate, as some brands guard their formulas closely to protect their product
If you plan to buy a pre-made bioactive substrate, here are some considerations to keep in mind as you choose:
- Ethically sourced ingredients?
- Reputable brand?
- Do they have a mix appropriate for your pet’s specific needs?
- Clear instructions on how to use it?
- Has it been it proven effective?
- How easy is it to maintain?
- What else is required to use with the product?
DIY Bioactive Substrates
Creating your own bioactive mix seems like a simple task at first — it’s just dirt, right? Wrong. Putting bugs in a bit of dirt does not magically make an enclosure bioactive. You need to create a healthy, functional soil mix that will support the health of its population of CUC organisms, plants, and of course, your pet.
Pros
- Ultimate customizability to your needs
- Less expensive, particularly in large quantities
Cons
- Requires lots of research into what makes a healthy substrate and the properties of different soil components
- Ingredients are going to be limited to what’s available at your local landscape supply/garden center
- You have to check each of your ingredients for contamination
- More likely to fail and possibly go septic
Tips for creating a great bioactive substrate mix:
Know your ingredient options and their properties, which will affect the function of the final product and what type of biome it’s suitable for. Common ingredients include:
- tree fern fiber
- fir/orchid bark
- coconut fiber
- peat moss
- cypress mulch
- sphagnum moss
- clay
- fine charcoal
- gravel
- coconut husk
- sand
Create your soil mix based on what type of biome your reptile or amphibian belongs to. The ingredients that work best for a semi-arid bioactive are going to be very different from the ingredients that work best for a tropical bioactive. Semi-arid mixes are likely to have less organic material and emphasize drainage, while tropical mixes are going to need more organic material and better moisture retention.
As you mix the soil, make sure to create pockets for healthy bacterial and fungal growth. Aerated soil is healthy soil, after all! Mixing in materials like leaf litter, sphagnum moss, and bark chips are all useful for this purpose.
Don’t forget your drainage layer for tropical setups, as this helps protect your plant from root rot, as well as helping discourage anaerobic bacterial growth. You can use gravel, small lava rock, expanded clay balls, or specifically-designed drainage material. You will need a sheet of fine mesh between the soil and the drainage layer to help prevent cross-contamination between the two layers.
Remember, whatever you put into your terrarium will stay in your terrarium, as it is a closed ecosystem. This is why it’s very important to thoroughly check the ingredients of everything you use to create your bioactive substrate.
Conclusion
If you’re experienced with bioactive setups and understand how to make it “work” long-term, mixing your own substrate is a good way to save money, especially if you want to set up a particularly large bioactive enclosure. However, if you’re new to the world of bioactive, buying a pre-made bioactive kit is more likely to help you experience success on your first try. Sometimes even experienced keepers make fundamental mistakes with their substrate composition which causes issues with their pets.
Of course, this is just the foundation, not the whole house. Even with the right substrate, you still need to account for the other factors of a successful bioactive terrarium: suitable microfauna (CUC), live plants, appropriate moisture, and appropriate light.
Whether you go pre-made or DIY, make sure to quarantine for pet for an appropriate period of time before introducing it to the enclosure so you don’t accidentally introduce nasties like parasites into your mini ecosystem. Bioactive setups should be given at least 1 month to establish before the inhabitant is introduced, anyway.
- Josh Halter